Quick info-tel post here. I’ve been asked this question a number of times by beginner archers and I always feel like saying to them, ‘You know we’ll talk about that later.’ And somehow ‘later’ never comes.
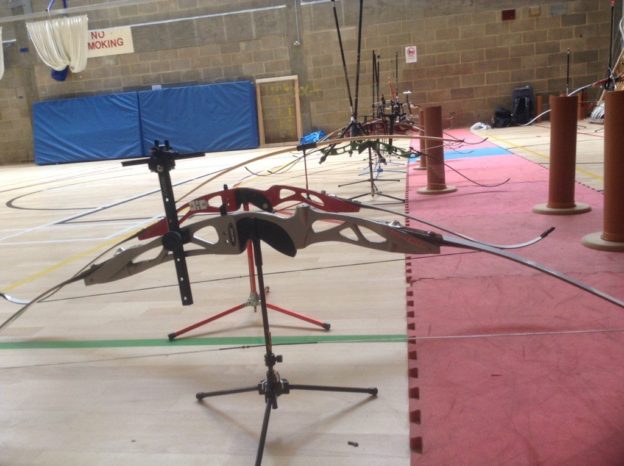
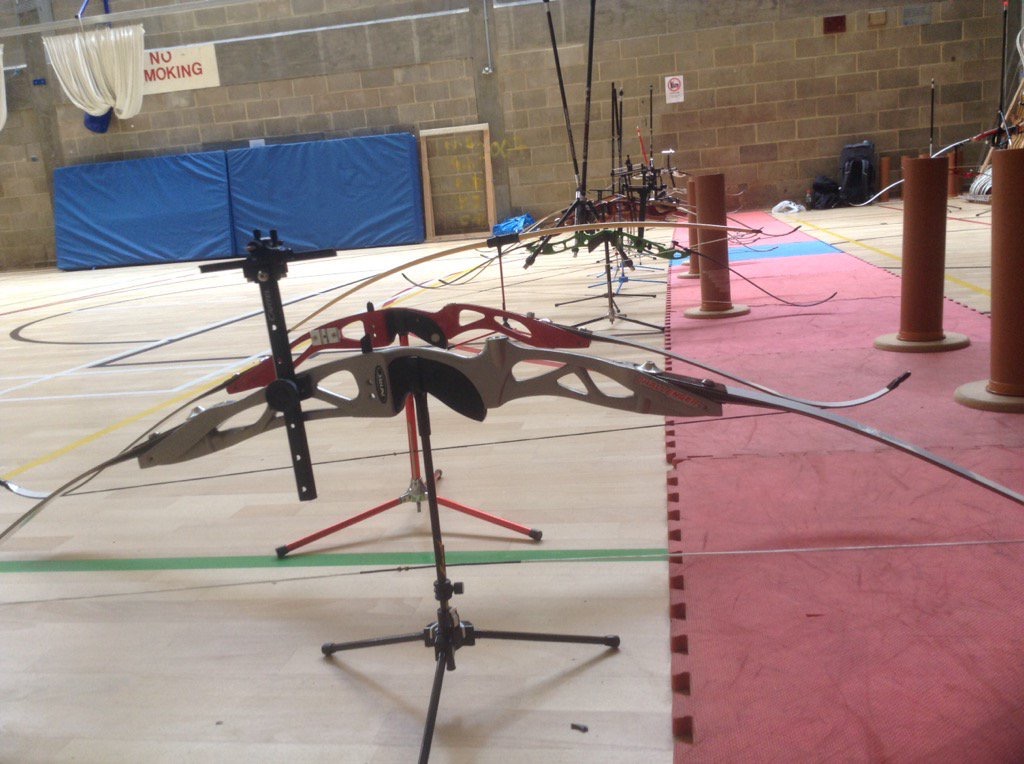
So, the answer, of course, is that one is for you to line up your arrow rest into the correct position and the other one is for your pressure button. And what, then, is a pressure button?
The quick answer is that it is a small ‘button’, that pushes through the riser in the middle of your arrow rest which has a spring inside that can be set to be more soft or more firm in order to help fix the archer’s paradox. But, if you’re reading about the archer’s paradox for the first time that doesn’t help much. So, what’s the best way to explain it? As you release your arrow it has to bend to clear it’s way around your riser. Unlike a slingshot where you can pull back the sling and have nothing in the way between the missile and target, with a bow and arrow as you draw the string back and point the arrow at the target you’ll find that you have a riser / bow right in front of where you’re shooting.
So, the arrow needs to bend around the riser – and there are some amazing slow motion videos (especially the ones by Beiter) showing it doing just that. Without a pressure button the arrow will bend as far as it can and as far as it needs to according to how good your release is, how bendable your arrows are (the spine) and the force with which you are releasing them (the weight of the bow).
Installing a pressure button helps to achieve two things – it helps to correct the archer’s paradox (as far as possible) and it helps you to get the perfect ‘tune’ to your arrows by allowing more or less bend in the arrow shaft and it also allows you to set the ‘centre shot’ – basically the optimum position for pointing the arrow down range that will give it the most help to snake its way around the riser.
So, that is the very basic start of an answer about taking your first steps in tuning. For more information I recommend taking a look at The Archer’s Reference Guide (free although they’re grateful for donations) or, if you have a bit of cash to spend and you’re willing to go into some depth, the best book on the subject is Simon Needham’s The Art of Repetition – along with the companion DVD.
What was it that got you into archery in the first place? Were you inspired by Katniss Everdeen from the Hunger Games, watching the Olympics, the competition and social environment of the club or was it something you have always wanted to do and finally came round to doing! Whatever the reason, there comes a stage where you want to buy your first bow! The excitement and extensive choice, will make one feel like a child in a sweet store. For some it might even be overwhelming, whilst others might become a little on the hyperactive side…
To help you feel that you have a better understanding of what would work for you and complement your style, you should consider the 4 P’s:
Purpose, Progression, Price and Preference.
PURPOSE – What is my purpose and goal of shooting?
There is a big difference between what an Olympic archer would invest in and hobbyist shooting every once in a while in their backyard. There are many reasons why people learn to shoot whether it is for recreation, hunting, to competing at differing levels, from inhouse club competitions to national standards. This will have a significant influence in the style of kit you will buy and many of the features that your require in your bow.
PROGRESSION – How long do you think you will keep the bow for?
A big misconception with new archers is that they need to start with a cheap entry level bow. The reality is that you can skip this, especially if you have been learning using club or rented equipment. Bows are meant to last forever like your sturdy steed, but for different reasons archers will buy other bows. They might want to improve their performance with a more specialized bow or attain a bow that is more personalised (Neon green maybe). Therefore you might want to consider if this bow will give you the ability to progress and how long you can see yourself shooting this style of bow.
PRICE – What is my budget?
Naturally this will make a significant difference on what choices you have when purchasing your first bow. I wouldn’t advise rushing and buying the cheapest bow you can find online, as you might end up feeling ripped-off and even end up tarnishing your experience of archery.We definitely wouldn’t want that happening to you. Yet, you don’t have to burn a hole in your pocket to get a good quality and appropriate bow to fit you!
Depending on how quickly you wish to progress to a new bow (maybe even another style) you might be willing to spend less money than if you wish to invest in a single bow that you will be using for many years down the line (you might even pass it onto your kids!). Remember to include in your budget the required accessories such as arrows, quiver, fingers tabs and bracers which you will need.
Understandably, some people are often afraid to spend a lot of money on a bow, when they are not confident that they will stay with the sport or be cash strapped. A way to cut costs is by going second hand or ebay (see our earlier blog on: www.2020archery.co.uk/blog/should-i-buy-second-hand-archery-gear/ ), but be careful, do your research and ask club members or instructors for advice if you are unsure. Yet the more confident you are with your commitment, the more you will save in the long term with better equipment, as you will begin to develop and grow into a better bow sooner.
PREFERENCE – Is there a particular style you wish to shoot?
Archery has a spectrum of styles and there’s nothing wrong opting for a traditional bow than for a snazzy Olympic recurve. It is important you buy the style of bow you want to use, because at the end of the day you will be shooting it. The bow must feel right from both an aesthetic perspective ( yes that is important many people might not want to shoot a neon green bow) to the functionality for your chosen style of shooting.
Before you click the “buy it now“ button it is important that you consider the above categories and have done your research. The internet is an amazing source of information and so are our club members, instructors and local archery stores (We recommend **** in London). Please remember to check your clubs rules and regulations,before purchasing your bow, as there will be specific guideline on draw weight, types of arrows etc…. that are allowed to be shot. If you have done your research and are confident about which bow you want, then what are you waiting for!
Longbows are, at least for a British archer, the ultimate type of bow. Robin Hood, if you ignore the latest cinematic flop, shot an English longbow. The English army won at Agincourt with longbows shot by both English and Welsh archers. The English longbow is the reason that yew trees almost became extinct in Europe in the 16th century. Longbows are as synonymous with the history of Great Britain as the royal family, bowler hats, and arguments about Marmite.
Back when I primarily shot a recurve bow, I always said I would get a longbow when I scored 550 out of 600 on a full 60-arrow Portsmouth round. I’ve held a personal best of 549 for a couple of years, and the fact that I mainly shoot an American flatbow these days means I’m very unlikely to beat that. If I can’t reach my target for buying a longbow, I figured I’d just have to build one.
Sadly, I have the carpentry skills of a lump of wood. I
sought out a proper longbow making workshop.
Finding a course
These days, longbows aren’t cheap: buying new, they start at around £200 for a very basic model and rapidly go up to £500+. Paying more doesn’t get you any particular advancement—this is a longbow, after all, not a fancy compound bow—but you do get a longbow made with better materials and with fancier nocks, crafted by bowyers clothed in original sheepskin who meditate in caves overlooking the sea.
Courses to build longbows, meanwhile, also hover at around the £300 mark. The courses themselves vary: some are single days, some are full weekends in a group where you camp and craft arrows for your bow. I opted to see Will Lord, an expert in prehistoric survival skills. His workshop lasts a single day and is taught one-to-one. He used to teach groups, he told me, but you end up with people fighting over the equipment and it’s all much less personal.
I visited Will at his home in Suffolk; a beautiful cottage near
Bury St Edmonds. We’d exchanged a few emails prior to meeting up, and I’d let
him know that I was looking to build a bow with a draw weight in the region of
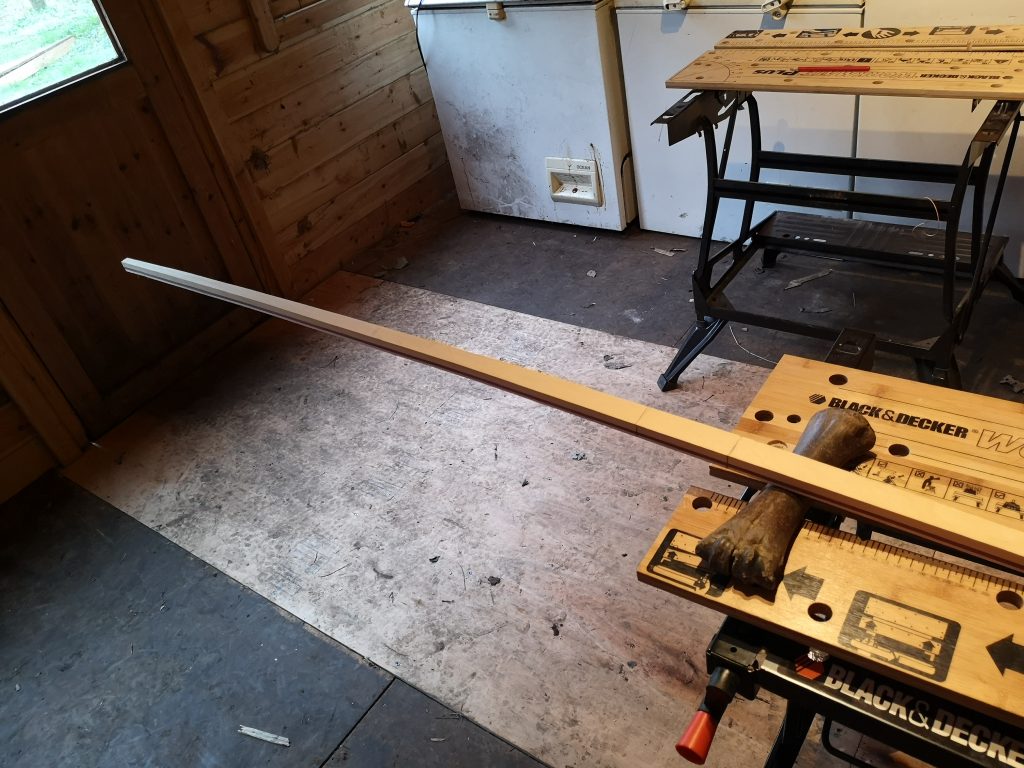
35 to 40 pounds. This let him construct the initial stave with layers of hickory,
purpleheart and lemon wood. After that, though, I’d be doing most of the work.
Building the bow
First up, shaping the limbs. Will had me using a wooden spokeshave, a form of plane originally used to round off wagon wheel spokes and later adopted by shipbuilders, to shape the rectangular cross section of the stave down into the classic curved D shape. He admits that this is not the most traditional method of shaping bow limbs, but it allows the bowyer to attune to and communicate with the wood. In my case, that communication mostly began as an argument, but under Will’s guidance I slowly improved. As the limbs take their required form, they are finely smoothed with sandpaper and—eventually—wire wool.
Once I’d mostly convinced the stave to be the right shape, we attached a premade bowstring and tested the draw weight. This is largely defined by the thickness of the purpleheart core and the lemon wood belly. We drew the bow to 35 pounds: perfect. Shortening the bow might raise the poundage, but we kept it full length at around 6 feet 7 inches: larger than the average and possibly a future cause of awkward journeys on the London Underground, but it looks perfect. We sharpened the points of the stave and attached blocks of water buffalo horn to both ends to form the string nocks. While the glue dried, we moseyed off to make a string of my own.
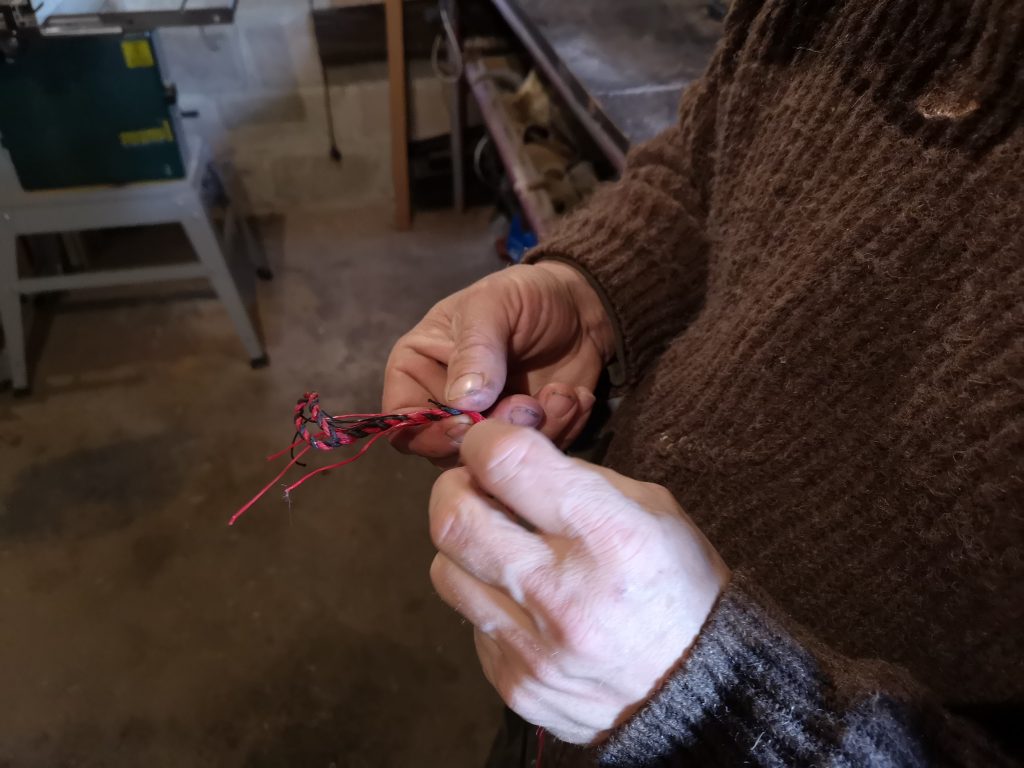
Making a bowstring involves effectively plaiting the ends of 2 separate strings together, with each of those strings being made up of 6 or 7 threads. I chose a mix of red and black threads; Will demonstrated the braiding technique on one end and I followed suit on the other, before handing back to him to tie it all off. A few twists in the bowstring and we were done.
When the buffalo horns were properly glued onto the bow stave, we then sanded them down to curved nocks. Truthfully, my only major crisis of the day was over-sanding the nock on the bottom bow limb, cutting into the wood that I’d so carefully pared down earlier. Will masterfully fixed most of the issue with his pocket knife, leaving me the relatively easy task of smoothing the wood again so that the mistake was practically invisible, although the nock on the bottom limb of the bow is now smaller than the nock on the top limb. If nothing else, it’s easy to see which end of the bow should point towards the ground.
The final touches
A final sand down of the stave and a coat of wax added a
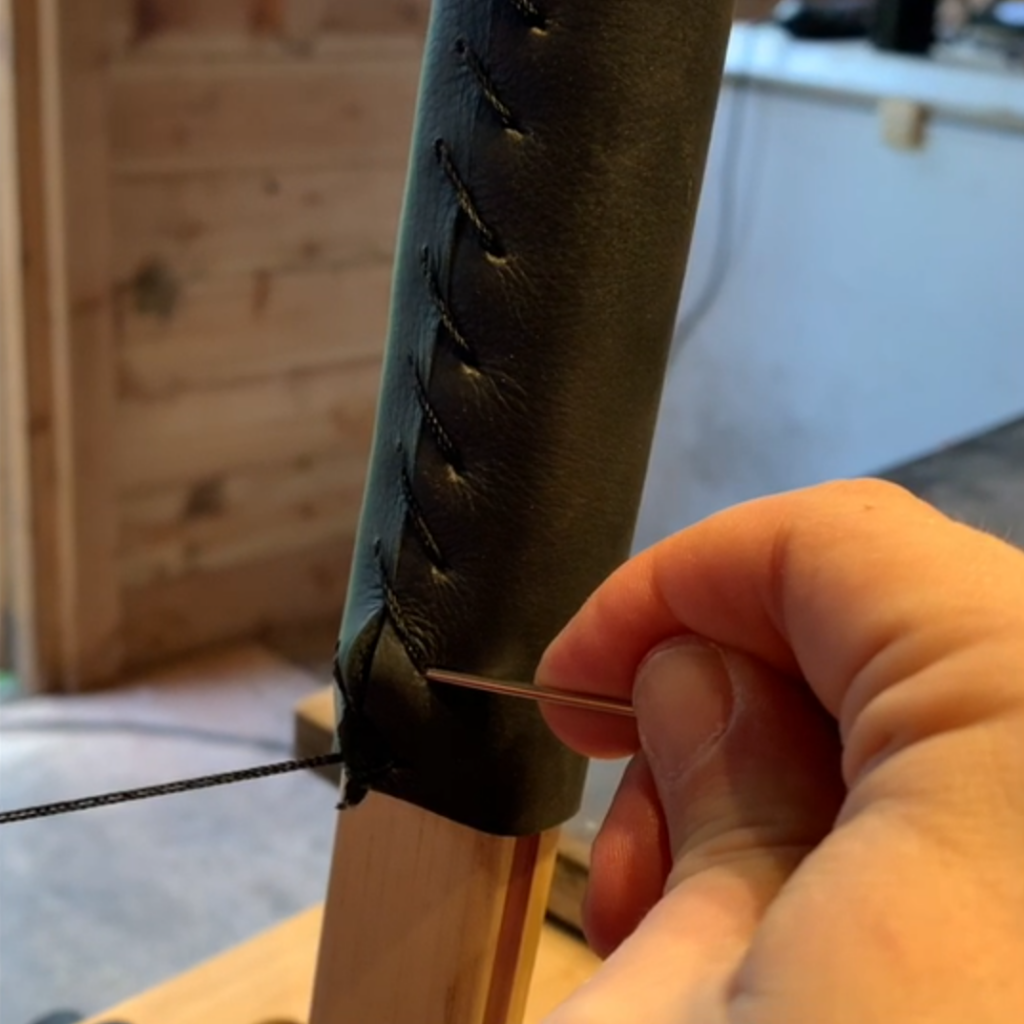
shine to the bow, and then we were on the final stage: building the grip. Will
attached a thin piece of wood to thicken the middle of the bow, and then we cut
a piece of leather to size for the grip itself. We used an awl to poke holes in
the leather and stitched the grip into place, before hammering out and attaching
2 red circles of leather to decorate each end.
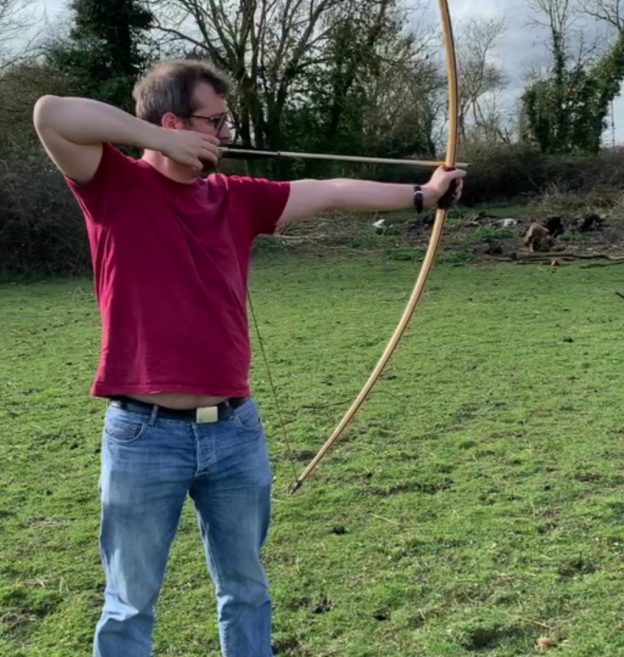
Bow complete. I took a few test shots outside in the field behind Will’s house, which allowed me to bask in the glory of shooting the bow I’d built and gave Will the opportunity to up-sell his arrow making course, where participants learn to forge their arrow heads from scratch. At some point, I will be going back.
The day was brilliant. Will is a patient teacher who has a comprehensive knowledge of his subject matter, and who will always step in the moment you have any difficulties. The bow I built is by no means perfect, but I built it and named it (I’ve never thought to name either of my other bows, but this longbow is “Suzy”) and so it will always have a special quality that all the money in the world could not buy. It shoots just as well as any shop-bought longbow you might buy for a similar price. If you’re in the market for a longbow, this might be one of the best and most satisfying ways of acquiring one.
Visit Will Lord’s website for more information about his longbow workshops and the multitude of other courses he teaches.
Our club is the ideal place to shoot a longbow, or indeed almost any other type of bow! Find out more here.
We often forget how much terminology we use in archery and how daunting it can be as a beginner so we thought we’d tackle a few of the big questions here on the blog starting with:
What does it mean when my archery instructor says that someone is ‘over bowed’?
Obviously, it doesn’t mean that they have too many bows because we all know that you can never have too many bows. This is what garages were invented for (or in London spare bedrooms, large cupboards, or any available wall or floor space). It actually means that the weight of the bow that the person is trying to pull is too much for them.
So, firstly ‘how can you tell?’ and secondly, ‘why is that a problem?’ Well, the second most important rule of archery (the first is about where you’re pointing the pointy end) is that in order to be successful an archer must be completely in control of the shot at all times. You want a smooth, repeatable shot cycle – which is exactly the same for every single shot that you take.
So, how do we know you’re over bowed? A good sign is if you see the archer wobbling around, raising their shoulders (no they shouldn’t be up around your ears and yes, it is possible for them to come down) or doing any one of a million other small, painful things (huge tension in the neck is another giveaway or grim locked-jaw with throbbing forehead veins) to try and brace yourself for the huge HOICK back… then you’re not fully in control.
Why is it a problem? Because it throws your shot off and because it’s not repeatable. If you are over bowed it will get progressively worse through the session as you tire – meaning ever more random things start to become part of your shot. We practice regularly to try to build muscle memory in a positive way – we REALLY don’t want for an archer to build in any of those painful things. So, if you feel that you’re tiring or perhaps you’re on the very edge of being over-bowed – once you start to feel that your shots are off, or you are not fully in control – then stop!
Give yourself the break and come back fresh another time.
You’ve decided to take the plunge and get your first bow. Well done! But what do you need to buy?
If you’re buying a traditional style bow, this is an easy question. Traditional bows are basically sticks with a piece of string attached, so really that’s where most of your money will go; anything left over will go on arrows and a bag and maybe some peripherals such as a quiver, finger tab (or glove), and an arm bracer.
For a modern recurve, the answer is more involved. Modern recurves are modular, so there are choices to make around each part of the bow. Some of this is based on your physique and skill (how big should the bow be? How powerful?), but much of it will be around personal preference and what type of shooting you enjoy.
The 2 most likely questions for a budding archer to ask immediately after their first lesson are: “How much does a bow cost?” and “Where can I buy one?”. I generally recommend that any aspiring archer holds off buying a bow until they’ve been shooting regularly at a club for a while (6 months or more), but sooner or later we all hear the siren call of shiny new archery equipment.
Where can I buy a bow?
There are plenty of places you can buy a bow; Amazon and eBay are filled with beginner kits, second hand bows, and general equipment. Heidi, archer-in-chief at 2020, bought her first bow (a second hand beginner kit) via eBay and never looked back. However, while you might be able to find a bargain, many new archers may not know their draw length, required poundage, or simply how a bow fits together. Without the guiding hand of an expert, it is easy to end up with a duffer.
When buying your first bow, I think your best bet is to buy directly from a dedicated archery shop. Most archery shops these days have websites if you just want a quiver or a finger tab, but if you’re starting out with your first bow, you would be better off taking a trip to a physical brick and mortar store. Continue reading →
When you feel that the time has come to buy your own bow, you have a decision to make that goes beyond your income and the distance to the nearest archery shop: traditional or modern?
2020 Archery teaches using a modern style – recurve training bows – and you can stick with the club bows (with no charge!) for as long as you need. But you’ll have seen club members using the full gamut of styles: longbows, flatbows (AKA the “American longbow”), horsebows, Olympic recurves, and the occasional compound bow. Broadly speaking, the former three cover the most popular styles of traditional archery, and the latter two are considered modern.
So what unseen force pushes the novice archer to follow one path over the other?
There was an economic aspect to my decision to go traditional: my first bow, a Buck Trail flatbow, cost around £130. That figure aligned far better with my bank balance than the £200-plus that a recurve could have set me back, even before all the accessories used with freestyle – long rod, V-bars, sights and what have you – were factored in. But even if I’d been feeling more flush, I think I’d still have gone trad. That’s partly because shooting a stick-and-string makes me feel closer to the historical archers I like to learn about, and partly down to a (somewhat masochistic) desire to find out just how far I can go with the uncompensated mechanics of my own body.
I don’t think traditional is in any way superior: it’s a very personal preference. But I was interested in what makes people, as a general rule, choose one school over the other. I was also curious as to how far people grow into their preferred style – how important is your shooting choice to your identity as an archer? Are you an archer who happens to prefer traditional, or are you firmly a Traditional Archer?
“I don’t differentiate between the two”, said Erin. “I’m currently shooting a recurve, but I definitely plan to buy a traditional bow in future.” Erin sees the positives of both: “With my modern bow I’m at the point where I’m confident my arrows will hit the target where I want them to, which is obviously a nice feeling. But I like the idea of trying out a bow that doesn’t have the sights and other accessories, to develop my style.”
Kat shoots a longbow, a style of archery that she’s been drawn to since a child. Her bow is made in the Victorian style – something I’d previously been unaware of, but Kat described a photograph, currently hanging in her hallway, of Victorian ladies shooting similar bows at Crystal Place. Whilst feeling a deep connection to the longbow, Kat has a good practical reason for her choice. “I’m dyspraxic, and the relative simplicity of the longbow suits me for that reason.”
I have oversimplified by defining the choice as simply Traditional versus Modern, of course. There is, at least some kind of, meeting point between the two in the form of recurve barebow and traditional barebow. The former is a good option for those who prefer to shoot a modern recurve, but without sights, stabilisers or draw check indicators. It’s not unusual to see a club member who usually shoots freestyle remove their sights and stabilisers, just to mix things up a bit. On such occasions, their fellow archers may be treated to said archer’s musings on how their “release feels different when I shoot it bare”, which certainly livens up the session. Recurve barebow is recognised by Archery GB in their national rankings, alongside freestyle recurve, compound and longbow.
Recurve traditional is similar to recurve barebow, but requires the use of wooden arrows, alongside a couple of other stipulations.
We also have a few compound shooters in our club. These bows are fast, accurate and comparatively easier to hold at full draw (although, remember that you DO have to pull it through the peak draw weight so you need to be able to control the full weight of the bow). Like recurves, compounds can be shot with or without stabilisers and sights. You can read Archery GB’s detailed explanation of the various bow styles in the Rules of Shooting.
So is tribalism in archery a big thing? Not in our club, it seems. Even those firmly attached to their preferred style have chosen it for personal or practical, not ideological, reasons, and everybody I spoke to expressed an interest in learning about the choices of others. Archers, it seems, are curious folk. In a good way.
But since this is my blog post and I’m a traditionalist, I’m going to end with YouTube archer NUSensei’s fine demonstration of the difference between freestyle and traditional shooting. The defence rests (on the arrow shelf).
So, we’ve decided to move our occasional “Ask the Expert” series away from facebook and onto our blog. Mainly because our experts (our instructors) are chronically unable to write a short answer when asked anything about archery. Be warned if you’re at the club and you start a query with, “Quick question…” it might be a quick question but it’s usually a lengthy answer!
So, this “Ask the Experts” is from Roger (well done Roger!) and gives an account of the differences between Recurve Bows (as used in the modern Olympics), Longbows (think Agincourt, Robin Hood etc), Horsebows (the short ones with leather webbing around them that you sometimes see in the club) and finally a little bit on crossbows. Please do add any other “Ask the Experts” questions in the comments below – we love talking bows and arrows!
Over to Roger :
“The difference between a modern recurve bow, a long bow and a horse bow is fundamentally one of curves and materials.
When unstrung an English (or Welsh or Scottish) long bow was – and is – a straight stave (wooden pole) with a D shaped cross section where the flat part faces away from the archer. They are typically 3” longer than the archer is tall. When strung, the bow takes a regular uniform curve towards the archer. They were traditionally made either from using several layers of different woods laminated together, or from a single stave of wood (self-bows). Laminated bows are made using woods that favour compression on the belly of the bow (the side that faces the archer), and woods that stretch well on the back of the bow (the side that faces the target). Self-bows tend to be slower and weaker although self bows made of yew or osage orange can be stronger as it is possible to find differing qualities of compression and tensional strength in a single stave, providing the same benefits as a laminated bow. The advantage of the long bow design is that it can be made very strong and can be tensioned to very high draw weights. In some cases these bows can reach over 180lb in draw weight (usually known as war-bows) – this allowed bowyers to manufacture bows that were capable of shooting an arrow through medieval plate armour at ranges as far as fifty yards or more.
The modern recurve bow is so called because the limb-tips of the bow ‘re-curve’ back away from the archer after the usual longbow curve. They usually have a static (unbending) riser and curved limbs. They also have a window cut into the bow to allow the arrow to take a straighter path through the bow. The window helps with accuracy as it allows the use of a stiffer arrow that can fly straighter than those released from a traditional bow where the arrow must bend itself back around the bow as its released in order to reach the target. The rationale behind the limbs “re-curving” away from the archer at the tips is so that the very ends of the limbs can be accelerated faster than the rest of the limb – this results in energy being transferred more efficiently. Ultimately this results in faster arrow speeds and improved accuracy on the target. Modern recurve bows are now typically fitted with various accessories such as artificial sights, stabilisers and vibration dampers to provide a more consistent shot.
The horse bow or reflex bow is the original recurve bow. They were common in Eastern European countries, the Middle East and throughout Asia and parts of Africa in pre-gunpowder days. They are characterised by their short length and exceptionally recurved limbs. When unstrung a traditional horse bow will curve away from the archer forming a complete C shape, but in some instances are so flexible that the limb tips almost touch forming an O shape. Their short profile made them highly successful as hunting bows (as they’re more manouverable than longer bows). They were originally made of wood laminated with horn and animal sinew although today they may be made with synthetic materials which make the bow cheaper to make and easier to use.
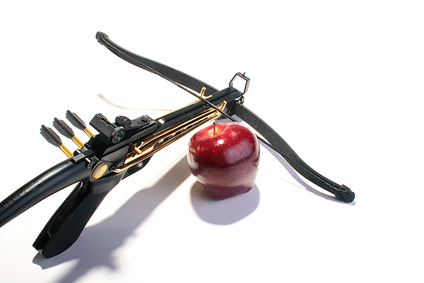
Finally, while we’re thinking about traditional bows, a crossbow can be loosely described as a short bow that is allowed to lie horizontally on a stock from which position it can have an arrow loaded and released using a trigger mechanism in a similar configuration to a rifle. The main advantage of a crossbow as a weapon is that once the string is drawn back it can be locked into place until the trigger is pulled. This allows the weapon to be loaded without being pointed at the target and without requiring any extra energy to be held at full draw for extended periods of time. Crossbows typically have much higher draw weights as the hold is done mechanically. Drawing or ‘cocking’ the bow can also be achieved with mechanical assistance by using a cocking aid. This means that bows over 100lb may be loaded with the aid of a winch by a single person. Cross bow limb design covers most types of bow shape and materials ranging from un-recurved basic wood through reflexed horn and sinew, to space-age material and radical modern design.”
As well as Target Archery there are many other disciplines that use both / all types of bows. You can get involved in everything from clout shooting, Archery Tag, field archery, bowfishing and the curiously named ‘Popinjay’ shoots… but what they all are will be for another post…!
As always, comments and questions are welcomed and suggestions for other “Ask the Experts” are especially useful!
I finally bought a bow! My very own and very first so I thought I’d share the experience.
I first started shooting in October 2012. I contemplated buying a bow in December but just before I planned to go shopping I went on vacation. When I got back I felt a bit like I was starting all over again. After a couple more useful months of practice (in February 2013), I realised that I was still shooting the 18lb club traIning bow. As I’d been practicing for around 5 months at this point I felt that I could probably manage something a little heavier. So each week I pushed myself a little and in three sessions I moved from 18 to 26lb (still using 2020 Archery bows)!
At the same time as I was increasing the poundage of the bow I started to gather information about equipment to try and make myself look like a knowledgeable buyer and mask (at least some of) my ignorance. So, on a sunny Saturday in March I set off to my nearest archery shop.A number of people had suggested that I should try out different risers so this was my plan. However, once I got to the store I discovered that there were only two risers within my budget (having a budget makes life far simpler).
The first riser that I tried was pretty awesome, and felt much heavier than the wooden club bow. By the time I tried the second one I was super tired from practicing with the first so it seemed heavier – despite the sales girl insisting that it was in fact lighter than the previous one. Even with the extra weight I thought that the second bow was pretty awesome as well! I basically couldn’t tell the difference at all. Except that the more expensive one was prettier to look at. I thought for a bit… and then thought a bit more… and then decided to buy the pretty one!
So I ended up with a beautiful red Hoyt Horizon riser and 26lb SF Premium limbs to go with it. I did buy an entire kit, mostly going for the cheaper options where possible. In total I came out with the bow plus 8 Jazz arrows with red/white fletchings, a basic sight, bow-stand, quiver, arm guard, finger tab, arrow puller and bow-stringer. I also bought a backpack as I can’t possibly carry it all without one. Most people told me that the whole thing would take about 3 hours, but I reckon that I did it in only about 30mins!
I was really eager to try it the next day, but as always seems to happen when I get very excited about something, bad luck followed and I woke up with flu. I had to wait an entire week before I could use my new kit. I turned up to the practice session at my usual time and found that It took me a good quarter of an hour just to fix everything together! I also made a good many mistakes as I did so and required a bit of help! Eventually I managed to get started and it then took me the next half of the session to nail down the sight marks. At this point I realised that shooting a club bow was a lot easier!
My second attempt was much better. I set up my kit in roughly 10 minutes – and managed to do it completely on my own without help. I also learnt that there is an upper limb and a lower limb and that they are not interchangeable! Ahem.
I’m now gradually getting to the point where I feel like the bow is right for me and its starting to feel like mine. Just as important as this is learning how to take care of it properly and – easier this one – learning to love it!
I got my first traditional bow last year and I was happily hooked soon thereafter. Even if I am wielding something that is more usually found in the gloomier regions of the Amazon Rainforest in an indoor hall near London Bridge it’s still rather a lot of fun! I soon decided to look into buying something better. What followed were many weeks trawling through the internet looking at random bits of tree and talking to some spectacular beards, and as such I thought it might be worth passing on some useful little tips which I picked up.
Modern traditional bows are an oxymoron as they are normally made up of 2 or 3 layers of wood called laminates. This is because different parts of the bow require different technical properties, specifically the ability to withstand compression or tension, and it’s impossible for one type of wood to do both equally well. Laminate bows therefore utilise woods with different types of properties in different parts of the bow which makes them better but more expensive than single piece self-bows.
Your bowyer will be able to give you detailed expert advice on the best types of wood to use and different bowyers prefer different types of wood. The following however is a good starter for 10, regardless of whether you go for an off-the-shelf bow or a more tailored one.
Bellywood. The belly of the bow is the part of the bow which is closest to the archer, and requires a wood which is capable of withstanding compression. The most common bellywood is Lemonwood which is cheap to use and found in most traditional bows. It won’t last more than a couple of years though before it starts to have a bend in it called string-follow, but it is excellent for a first traditional bow. [NB according to many bowyers, string-follow actually improves the performance of a bow, so like wine your bow will improve with age!]
Other bellywoods include Ipe, Yew, Osage Orange and Putu Jumau. Each of these is excellent under compression making them ideal for the belly of a bow, if in doubt, go for the one whose colour you like best – a traditional bow can, and indeed should, be something beautiful.
Corewood. The core or middle of the bow is the foundation of the bow and is typically made of a very hard wood, indeed the harder the better. The most common are Purpleheart or Greenheart which are excellent corewoods and, because of their availability, they are cheap.
Other corewoods include Balau [“harder than the knockers of hell” as one chap colourfully described it], Ipe, Yew, Padauk, Bubinga, Snakewood and a whole host of other woods I have never heard of – as with bellywood if in doubt go with the one whose colour you like best.
You will note that Yew and Ipe, and indeed several others, can be used as both core and belly woods, in such a case you would end up with a bi- as opposed to a tri-laminate bow.
Backwood. The back of the bow is the part of the bow furthest from the archer and requires a wood which is capable of withstanding tension. By far the best backwood is Bamboo, which unfortunately is also the most expensive. If you are buying a tailored bow, it is worth sacrificing cost elsewhere in the bow to be able to have a Bamboo back. Hickory or Maple are also perfectly good choices for heavy (60lb’s or more) and lighter bows respectively.
Traditional bows come in a whole host of different types, shapes and sizes from delicate flat bows to 140lb warbows, each of which however will incorporate the ideas discussed above. Go on give it a go, you won’t regret it!